Lab 1A: Artemis
Objective: To familiarize myself with the Arduino IDE and the Artemis board. Get comfortable programming the board, managing basic outputs, communicating via serial connection, and utilizing the onboard sensors.
Pre-Lab: Installed the latest versions of Arduino IDE and Sparkfun Apollo3 boards manager.
Task 1: Blink
Uploaded the Blink.ino code to the RedBoard Artemis Nano.
Task 2: Serial
Uploaded the Example04_Serial.ino code to the RedBoard Artemis Nano.
Task 3: Temperature
Uploaded the Example02_AnalogRead.ino code to the RedBoard Artemis Nano. As I read the Serial Monitor, I realized that the temperature was not in units that I could easily understand, so I commented out the two Serial.print commands the original code had. I added my own Serial.print for the variable temp_f which contains the calculated temperature value in Farenheit.
Task 4: Microphone
Uploaded the Example1_MicrophoneOutput.ino to the RedBoard Artemis Nano and experimented with different pitches to observe the loudest frequency displayed.
Task 5: Blink with C-note
I combined the Blink.ino and Example1_MicrophoneOutput.ino sketches into one and uploaded it to the board. Then, I searched online for a site that could play a C-note and found one that played both C3 and C4. I played these notes and observed their threshold frequencies. I decided to program the board for the C3 note and added an if-statement in the loop function of the new sketch to turn on the LED if the loudest frequency was within that threshold.
Back to Lab 1A on main page
Lab 1B: Bluetooth
Objective: To establish communication between my computer and the Artemis board via Bluetooth, which I will later use to send data from the Artemis board to the computer. To also be able to send Python commands from a Jupyter Notebook to the Artemis board while running Arduino.
Pre-Lab: Since I had the latest version of the Arduino, I proceeded with creating a new virtial environment named “FastRobots_ble”. I then activated the virtual environment so I could start working on Jupyter Lab.
Configurations: First thing I did was upload the ble_arduino.ino code to the Artemis board and get its MAC Address. With this I updated the artemis_address in connections.yaml. I proceeded with generating a new UUID so that it is unique to my board and I replaced the BLEService UUID in the ble_arduino.ino with this new UUID. I connected the Artemis board with the computer via Bluetooth by uploading this code in Jupyter Lab:

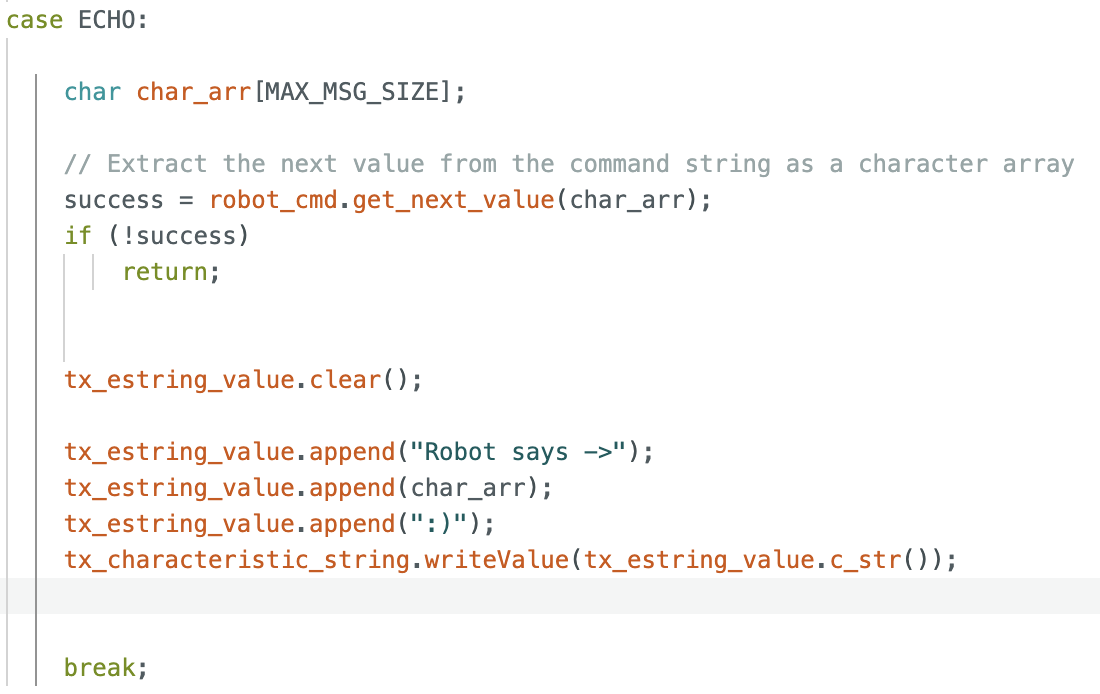
Task 1: Echo
For this task I analyzed the commands PING and SEND_TWO_INTS in the ble_arduino.ino code. With multiple hours of running and debugging I was able to understand what each of their commands do and make something similar for the ECHO command. This is my ECHO command:
And this is the Python side of it and how the computer replied to the ECHO command:

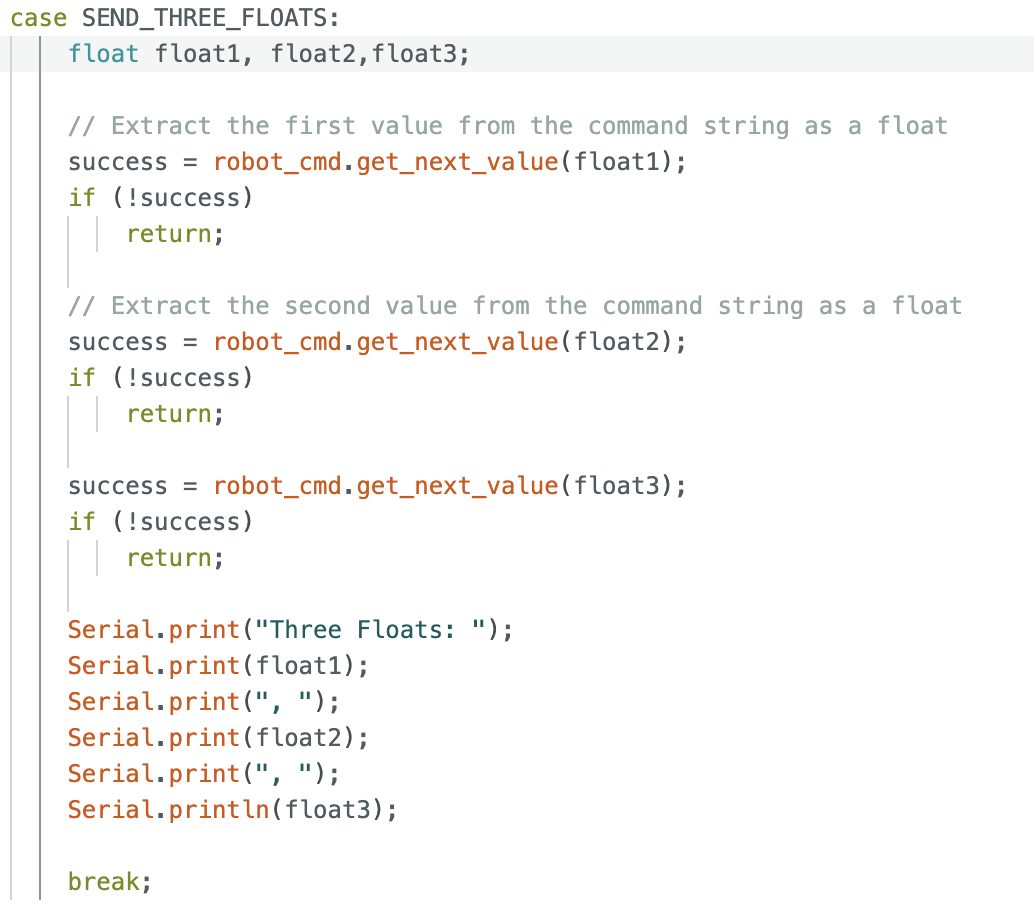
Task 2: SEND_THREE_FLOATS
I started by looking at the command SENT_TWO_INTS once again. I figured that if they are doing this with integers I could modify it so it takes in floats instead of integers, and that is what I did. I copy pasted the code, changed the class to a float and added an extra one so it is three floats being extracted. This is how the command looks in Arduino:
This is the command that was sent via Python:

This is what the Serial Monitor in Arduino printed out:

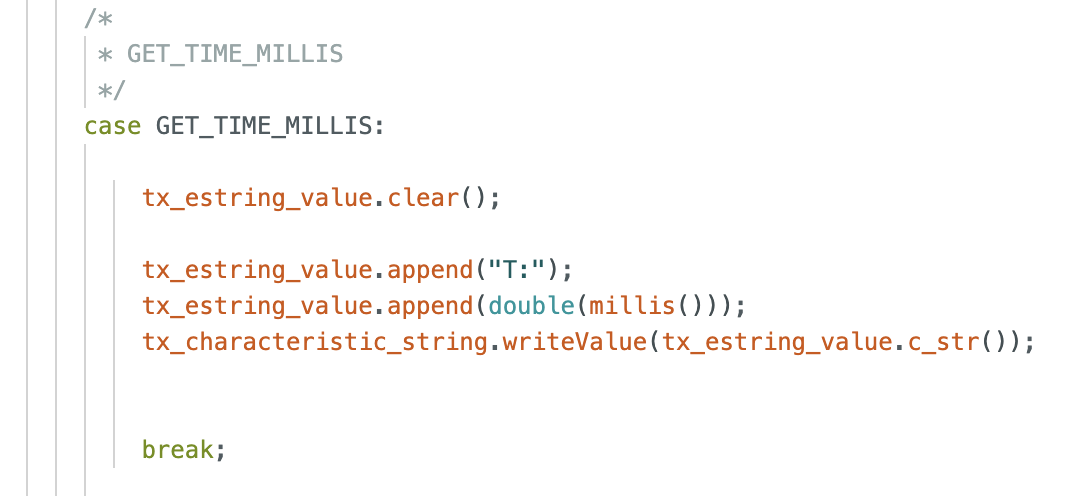
Task 3: GET_TIME_MILLIS
At first, I searched if there is a function in Arduino that would give you the time in milliseconds. Once I saw there is, I copied the code from the ECHO command and modified it so it would print the value of millis(). I ran into an error uploading the code to the board because I forgot to write a class for the millis function, but I then added double and I was able to upload it. This is my GET_TIME_MILLIS command:
Then, when I was trying to call the command on Python it kept showing an error that said “ AttributeError: GET_TIME_MILLIS”. I had not seen this error before and I could not understand it so I asked AI what the error meant and it said that “the command doesn’t exist in the CMD enum”. I remembered seeing in the folder ble_python a code called “cmd_types.py” that looked similar to what AI showed me. I went to that code and added the GET_TIME_MILLIS to it, following ECHO which is how I wrote it in the ble_arduino.ino code, and this is what the Python side looked like after I got it to work:

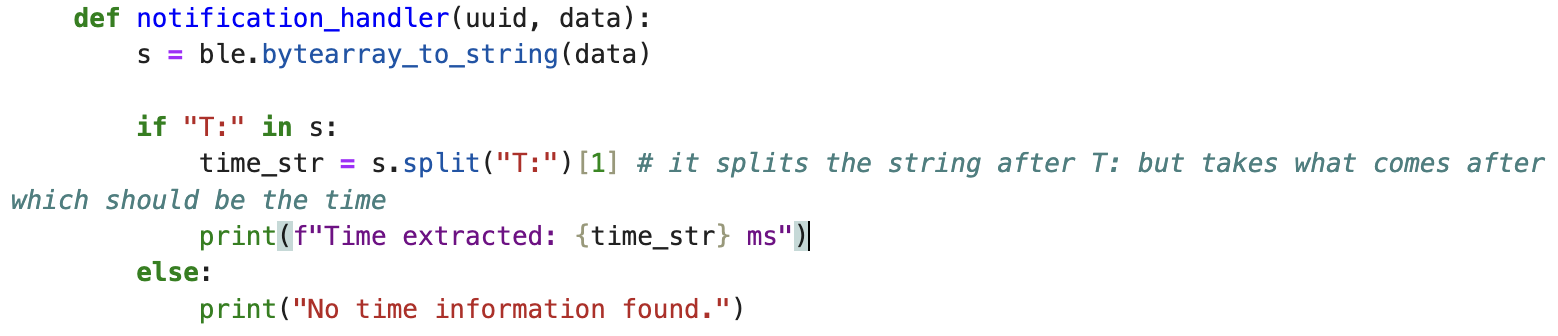
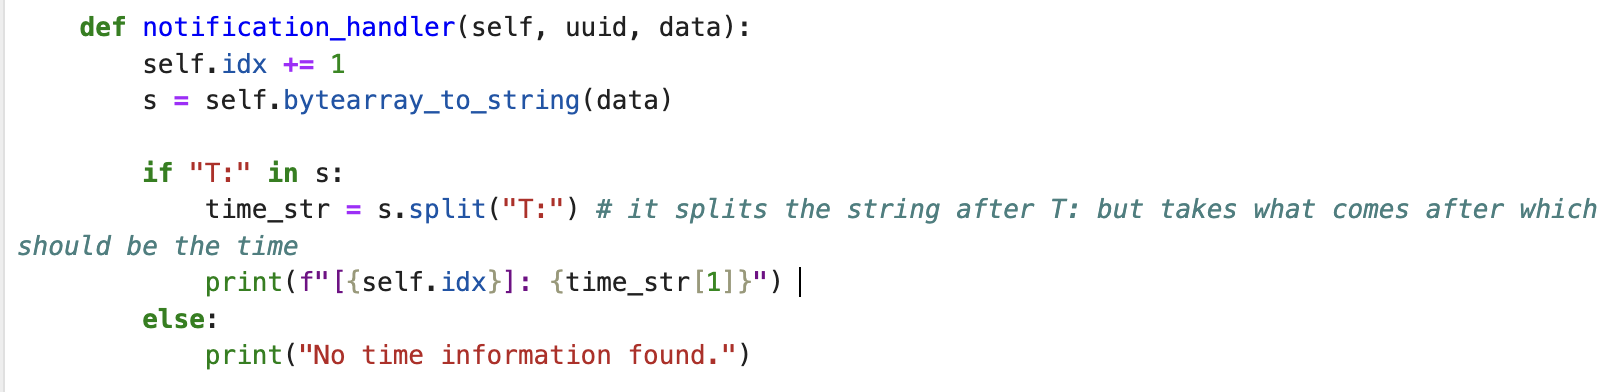
Task 4: Notification Handler
For this task, I created a notification handler that would receive the string from the board and extract the number. In the function I decided to look for "T:" in the string and extract whatever is after that. I was able to do this with the split function I found in the Python cheatsheet that's in the course website.
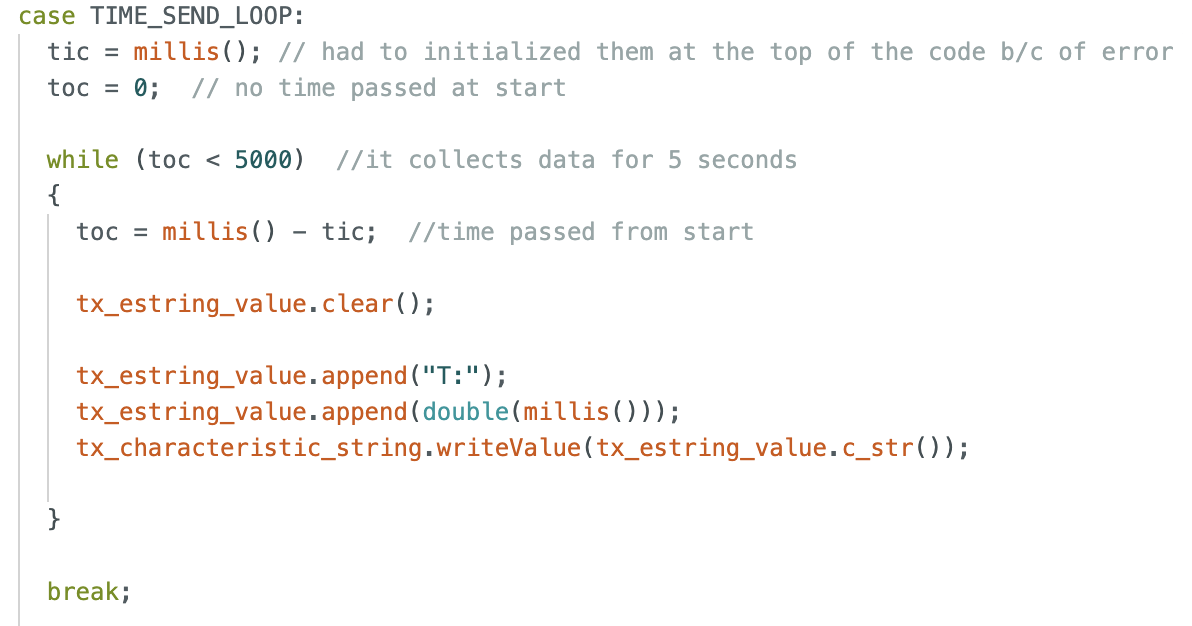
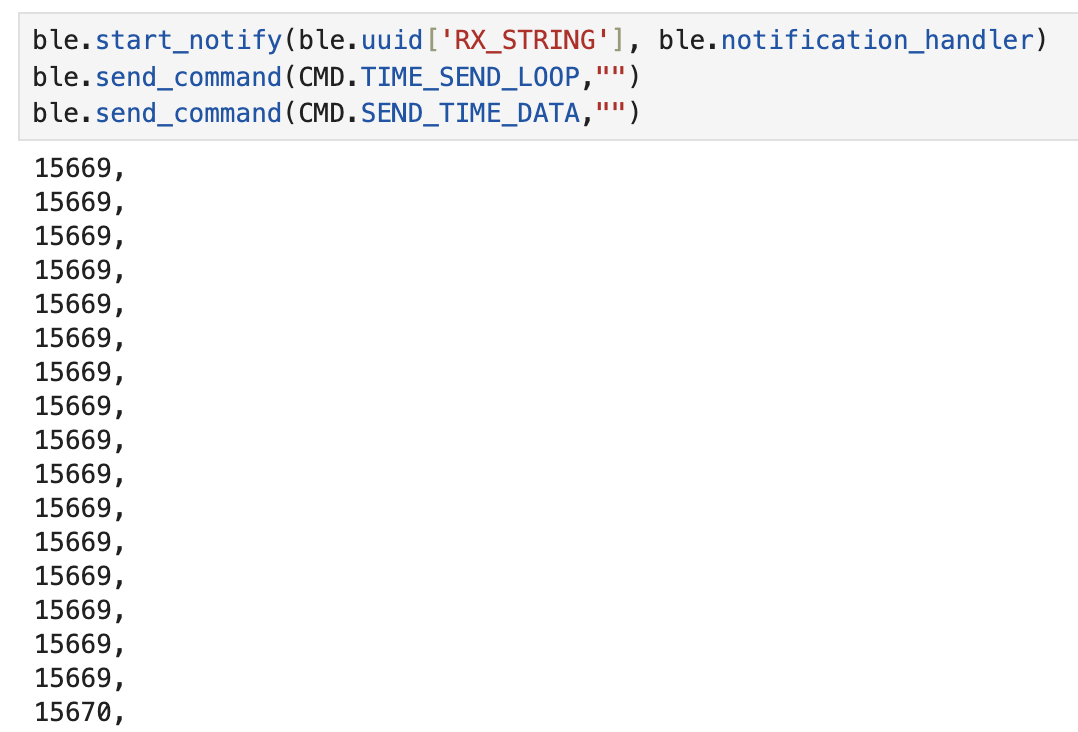
Task 5: Time Data Sending Loop
I first pasted the code from GET_TIME_MILLIS and then I added the condition so it only collects data for 5 seconds. I initialized both variables at the top of the code (as unsigned long) and then added this new function to the cmd_types.py code. This is TIME_SEND_LOOP in Arduino:
I ran into a few issues with the Python side and then i wanted to add some kind of index value to each line so I ended up altering my notification_handler function. This is the latest version:
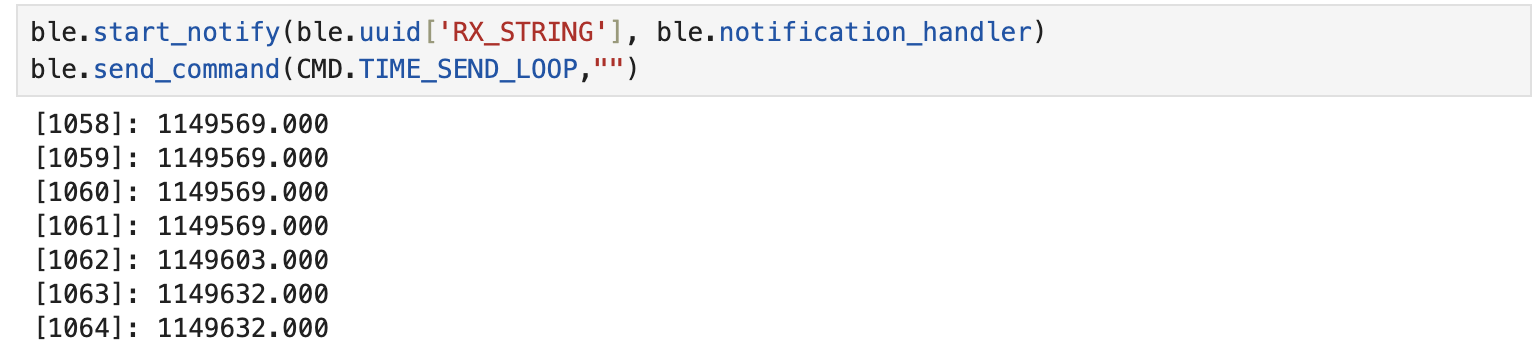
And this is what I called in Python and the output. There were 273 timestamps sent from the Arduino in 5 seconds which is about 54.6 messages per second.
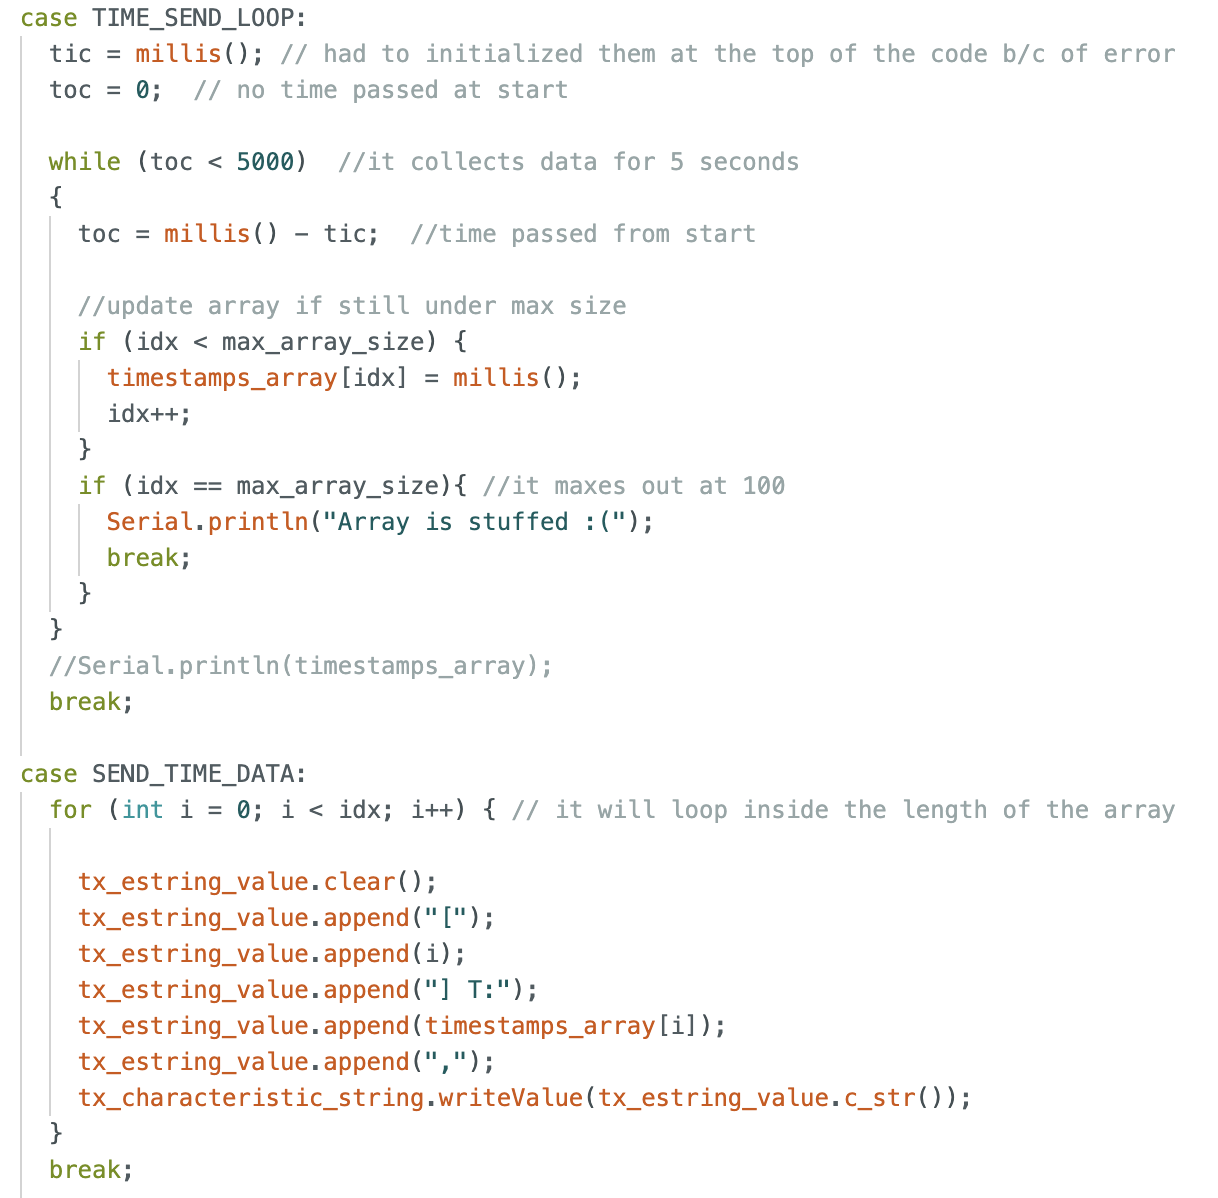
Task 6: Sending Time Data with Arrays
Before diving into the commands, here are the variables I had to initialize globally.

Here are the updated TIME_SEND_LOOP and the SEND_TIME_DATA. I added a break to the TIME_SEND_LOOP because when I ran it initially it was on a forever printing loop.
And this is the Python side:
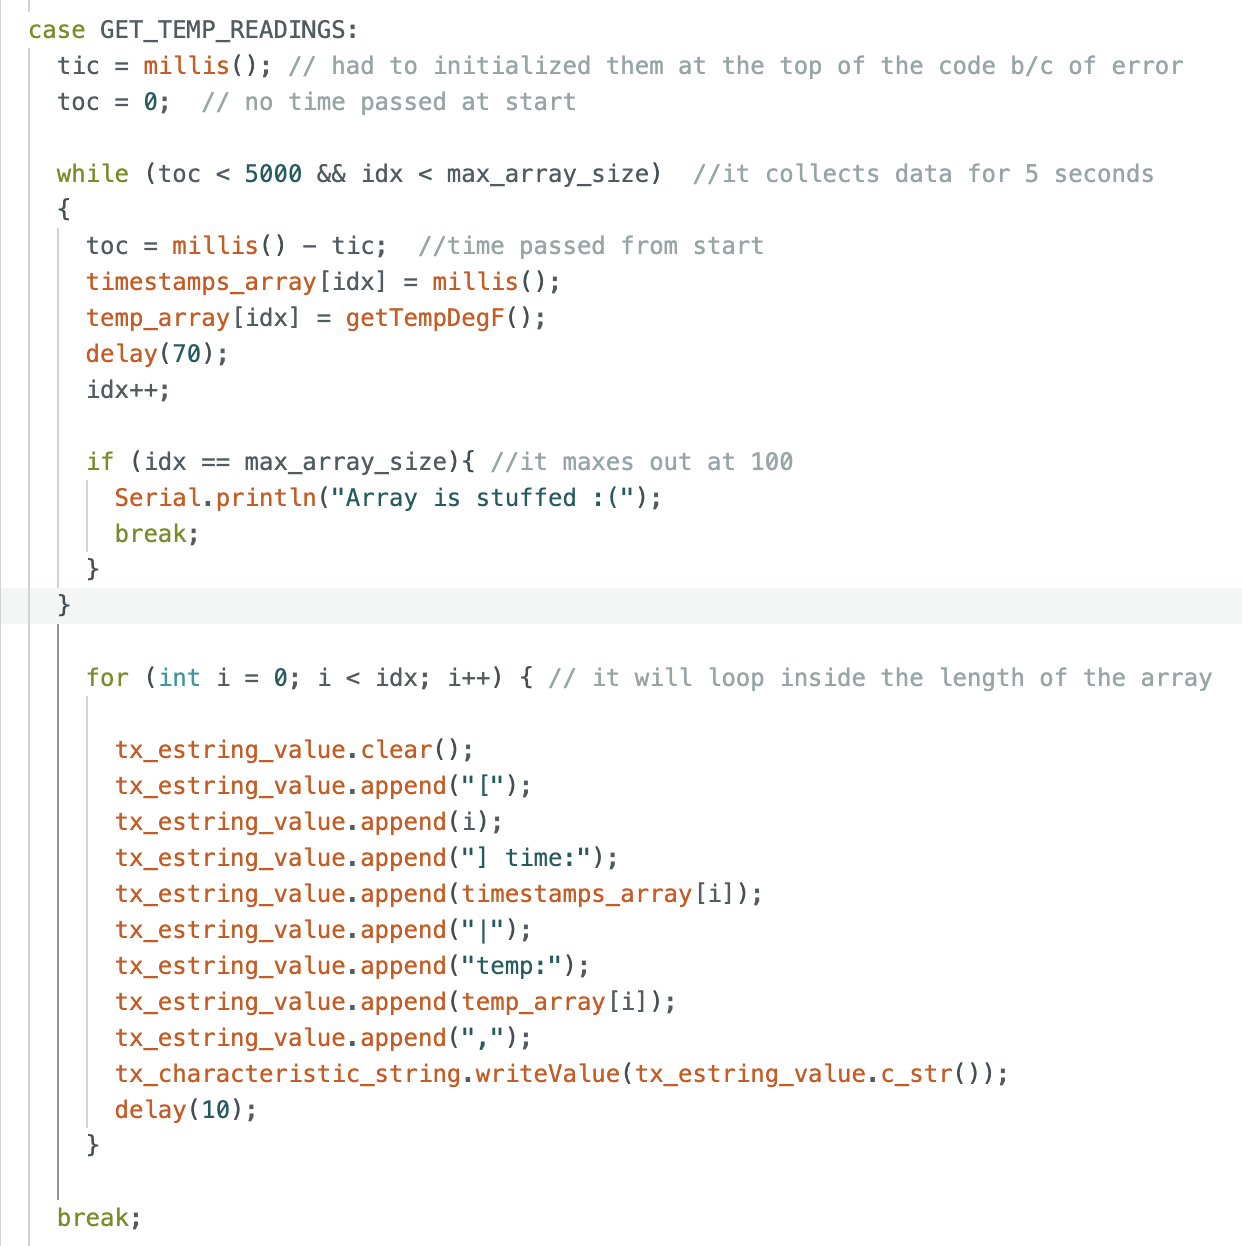
Task 7: Sending Time and Temperature with Arrays
I combined my two commands from before (TIME_SEND_LOOP and SEND_TIME_DATA) and then added the getTempDegF function we used in Lab 1A. When printing I ran into isuees with the time going back after increasing so I joined my while and if statements. I also added a few delays throughout the code so the sensor can have some time to think.
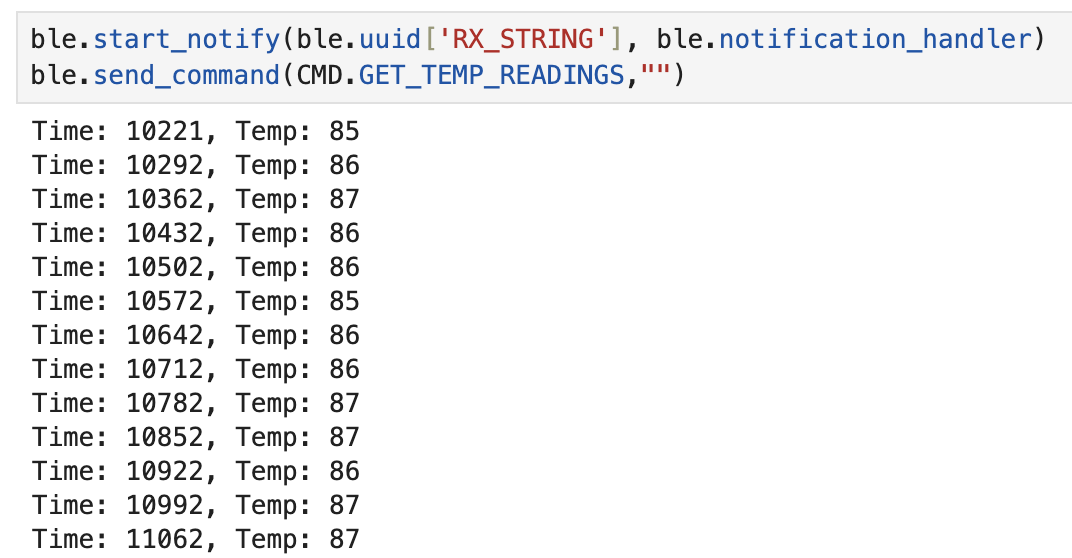
This is the Python side with the output:
Task 8: Advantages and Disadvantages of Both Methods
The second method (get_temp_readings) contains the most information which is beneficial because you won't need to run more than one code at a time. However, because it has the most information it takes longer than the first method to run. So if what you are looking is for both sets of data simultaneously then this is the right method. If you only care for the timestamps then the other code might interest you more. The second method has a 70 ms delay in the loop under 5 seconds which means that the system can record about 71 (5000 ms/70 ms) datapoints . Approximately the amount of data you can send without running out of memory would be: (384kB)*(1024 bytes/kB) = 393,216 [bytes of memory available]. And then the temperature reading and timestamp are each 4 bytes, so (393,216/8) = 49,152 entries of time and temperature data could be collected without running out of memory.
Discussion:
In each task, I discussed the challenges I encountered as they arose. Overall, I gained a much deeper understanding of Python’s structure and formatting. While I have had equal experience with Arduino and MATLAB, I was less proficient in Python. However, this lab provided an in-depth exploration of various Python concepts, significantly enhancing my proficiency. For Lab 1 I did look over Nila's page from last year, I double checked my functions whenever an error would pop up. However, I only code what I understand, so there are many things different between her code and mine since it can be seen that her level of profficiency in Python is way higher. Other than that, I used the Python Cheatsheet found in the class website for a few built i funcitons.